Competent
Mobile development flow
Mobile development flow:
create new application
If you are coming from a web background, the easiest way to get started with React Native is with Expo tools because they allow you to start a project without installing and configuring Xcode or Android Studio. Expo CLI sets up a development environment on your local machine and you can be writing a React Native app within minutes. For instant development, you can use Snack to try React Native out directly in your web browser.
If you are familiar with native development, you will likely want to use React Native CLI. It requires Xcode or Android Studio to get started. If you already have one of these tools installed, you should be able to get up and running within a few minutes. If they are not installed, you should expect to spend about an hour installing and configuring them.
build
Create ipa and apk from React Native
install to device(iPhone, android, winPhone)
Building your app for dev
- Plug in your device via USB Connect your iOS device to your Mac using a USB to Lightning cable. Navigate to the ios folder in your project, then open the .xcodeproj file, or if you are using CocoaPods open .xcworkspace, within it using Xcode.
If this is your first time running an app on your iOS device, you may need to register your device for development. Open the Product menu from Xcode's menubar, then go to Destination. Look for and select your device from the list. Xcode will then register your device for development.
- Configure code signing Register for an Apple developer account if you don't have one yet.
Select your project in the Xcode Project Navigator, then select your main target (it should share the same name as your project). Look for the "General" tab. Go to "Signing" and make sure your Apple developer account or team is selected under the Team dropdown. Do the same for the tests target (it ends with Tests, and is below your main target).
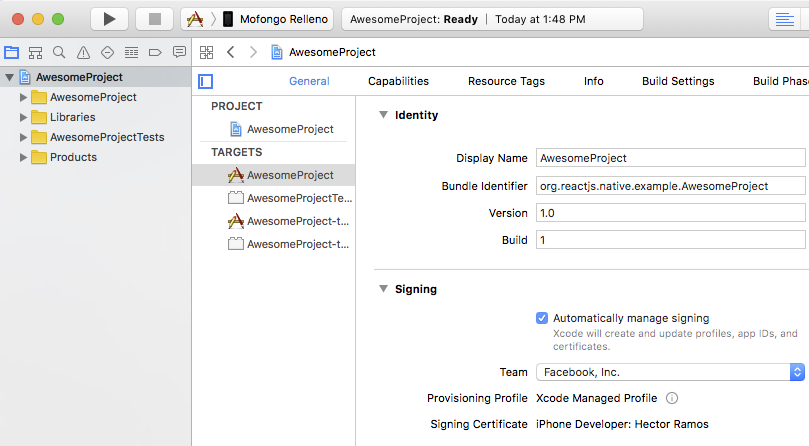
Repeat this step for the Tests target in your project.
- Build and Run your app If everything is set up correctly, your device will be listed as the build target in the Xcode toolbar, and it will also appear in the Devices pane (⇧⌘2). You can now press the Build and run button (⌘R) or select Run from the Product menu. Your app will launch on your device shortly.

Building your app for production
You have built a great app using React Native, and you are now itching to release it in the App Store. The process is the same as any other native iOS app, with some additional considerations to take into account.
If you are using Expo then read the Expo Guide for Building Standalone Apps.
- Enable App Transport Security App Transport Security is a security feature introduced in iOS 9 that rejects all HTTP requests that are not sent over HTTPS. This can result in HTTP traffic being blocked, including the developer React Native server. ATS is disabled for localhost by default in React Native projects in order to make development easier.
You should re-enable ATS prior to building your app for production by removing the localhost entry from the NSExceptionDomains dictionary in your Info.plist file in the ios/ folder. You can also re-enable ATS from within Xcode by opening your target properties under the Info pane and editing the App Transport Security Settings entry.
If your application needs to access HTTP resources on production, see this post to learn how to configure ATS on your project.
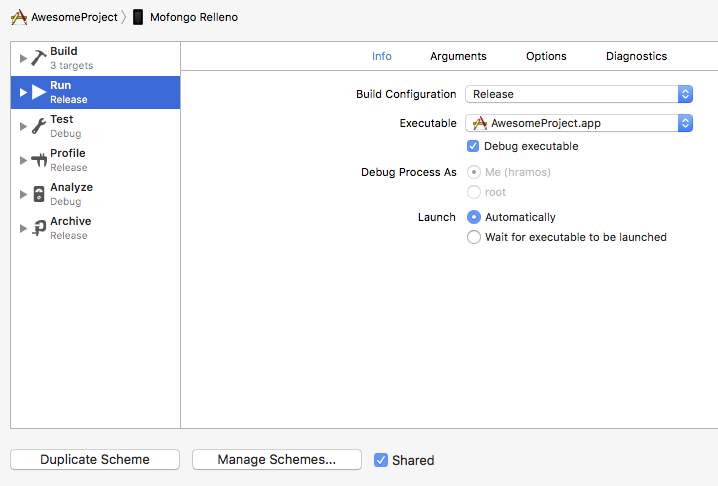
- Configure release scheme Building an app for distribution in the App Store requires using the Release scheme in Xcode. Apps built for Release will automatically disable the in-app Developer menu, which will prevent your users from inadvertently accessing the menu in production. It will also bundle the JavaScript locally, so you can put the app on a device and test whilst not connected to the computer.
To configure your app to be built using the Release scheme, go to Product → Scheme → Edit Scheme. Select the Run tab in the sidebar, then set the Build Configuration dropdown to Release.
- Build app for release You can now build your app for release by tapping ⌘B or selecting Product → Build from the menu bar. Once built for release, you'll be able to distribute the app to beta testers and submit the app to the App Store.
WARNING
You can also use the React Native CLI to perform this operation using the option --configuration with the value Release (e.g. react-native run-ios --configuration Release).
Mobile development: app debugging
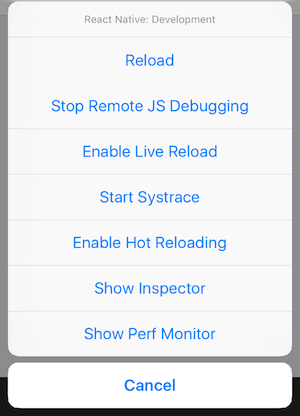
Accessing the In-App Developer Menu
You can access the developer menu by shaking your device or by selecting "Shake Gesture" inside the Hardware menu in the iOS Simulator. You can also use the ⌘D keyboard shortcut when your app is running in the iOS Simulator, or ⌘M when running in an Android emulator on Mac OS and Ctrl+M on Windows and Linux. Alternatively for Android, you can run the command adb shell input keyevent 82 to open the dev menu (82 being the Menu key code).
WARNING
The Developer Menu is disabled in release (production) builds.
Reloading JavaScript
Instead of recompiling your app every time you make a change, you can reload your app's JavaScript code instantly. To do so, select "Reload" from the Developer Menu. You can also press ⌘R in the iOS Simulator, or tap R twice on Android emulators.
Automatic reloading
You can speed up your development times by having your app reload automatically any time your code changes. Automatic reloading can be enabled by selecting "Enable Live Reload" from the Developer Menu.
You may even go a step further and keep your app running as new versions of your files are injected into the JavaScript bundle automatically by enabling Hot Reloading from the Developer Menu. This will allow you to persist the app's state through reloads.
WARNING
There are some instances where hot reloading cannot be implemented perfectly. If you run into any issues, use a full reload to reset your app.
You will need to rebuild your app for changes to take effect in certain situations:
- You have added new resources to your native app's bundle, such as an image in Images.xcassets on iOS or the res/drawable folder on Android.
- You have modified native code (Objective-C/Swift on iOS or Java/C++ on Android).
In-app Errors and Warnings
Errors and warnings are displayed inside your app in development builds.
Errors
In-app errors are displayed in a full screen alert with a red background inside your app. This screen is known as a RedBox. You can use console.error() to manually trigger one.
Warnings
Warnings will be displayed on screen with a yellow background. These alerts are known as YellowBoxes. Click on the alerts to show more information or to dismiss them.
As with a RedBox, you can use console.warn() to trigger a YellowBox.
YellowBoxes can be disabled during development by using console.disableYellowBox = true;. Specific warnings can be ignored programmatically by setting an array of prefixes that should be ignored:
import {YellowBox} from 'react-native';
YellowBox.ignoreWarnings(['Warning: ...']);
In CI/Xcode, YellowBoxes can also be disabled by setting the IS_TESTING environment variable.
WARNING
RedBoxes and YellowBoxes are automatically disabled in release (production) builds.
Chrome Developer Tools
To debug the JavaScript code in Chrome, select "Debug JS Remotely" from the Developer Menu. This will open a new tab at http://localhost:8081/debugger-ui.
Select Tools → Developer Tools from the Chrome Menu to open the Developer Tools. You may also access the DevTools using keyboard shortcuts (⌘⌥I on macOS, Ctrl Shift I on Windows). You may also want to enable Pause On Caught Exceptions for a better debugging experience.
Note: the React Developer Tools Chrome extension does not work with React Native, but you can use its standalone version instead. Read this section to learn how.
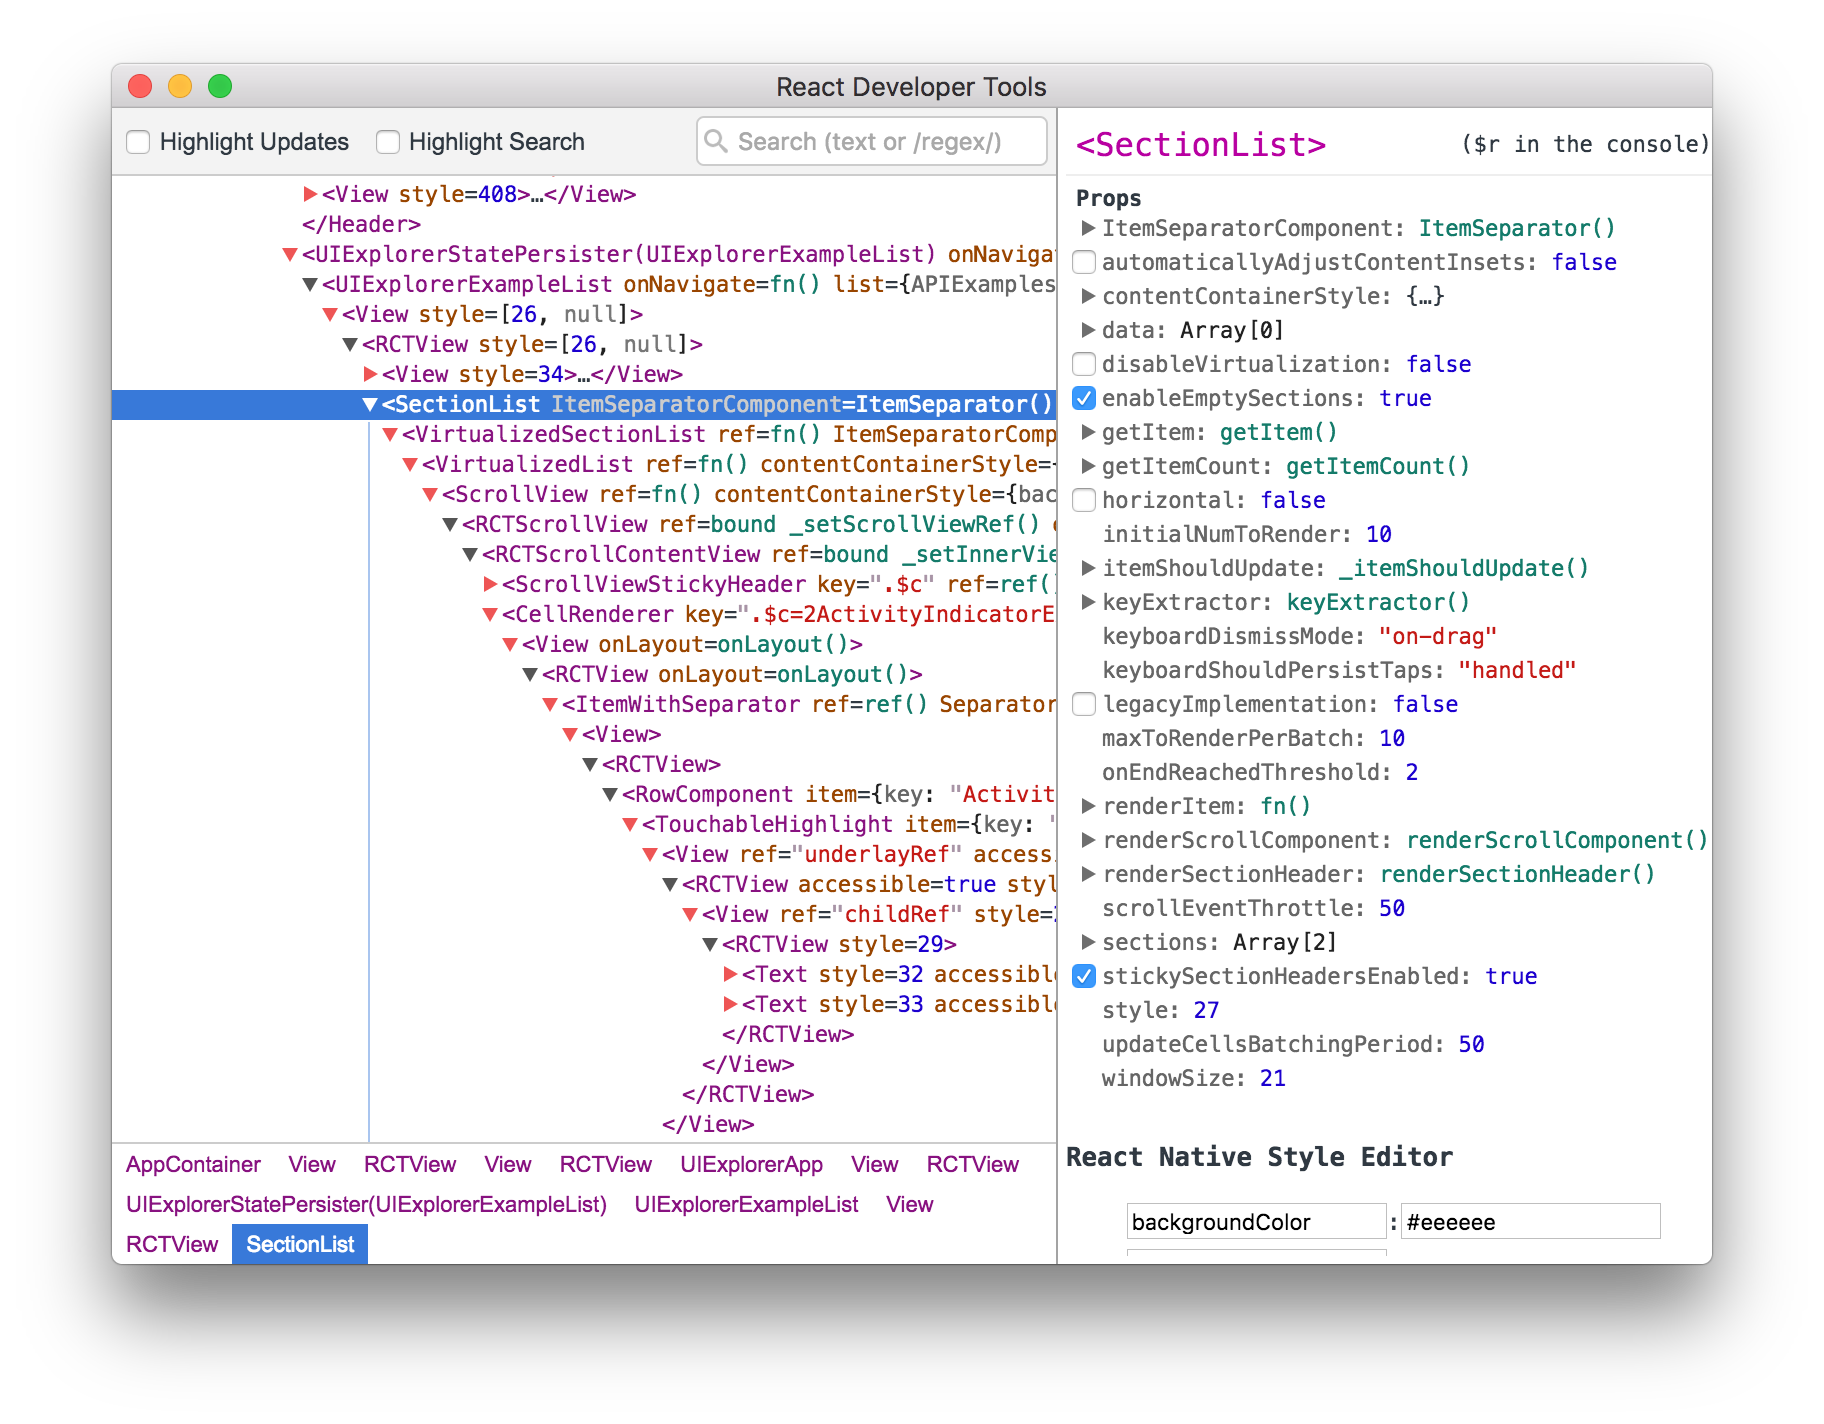
React Developer Tools
You can use the standalone version of React Developer Tools to debug the React component hierarchy. To use it, install the react-devtools package globally:
npm install -g react-devtools
Now run react-devtools from the terminal to launch the standalone DevTools app:
react-devtools
Accessing console logs
You can display the console logs for an iOS or Android app by using the following commands in a terminal while the app is running:
$ react-native log-ios
$ react-native log-android
Using of geolocation
The Geolocation API extends the Geolocation web spec
As a browser polyfill, this API is available through the navigator.geolocation global - you do not need to import it.
On Android, this uses the android.location API. This API is not recommended by Google because it is less accurate and slower than the recommended Google Location Services API. In order to use it with React Native, use the react-native-geolocation-service module.
import React from 'react';
import { StyleSheet, Text, View } from 'react-native';

export default class App extends React.Component {
    state = {
        ready: false,
        where: {
          lat: null,
          lng: null,
        },
        error: null
    };

    componentDidMount(){
        let geoOptions = {
            enableHighAccuracy: true,
            timeOut: 20000,
            maximumAge: 60 * 60 * 24
        };
        this.setState({
          ready:false,
          error: null
        });
        return navigator
            .geolocation
            .getCurrentPosition(
                this.geoSuccess,
                this.geoFailure,
                geoOptions
            );
    }

    geoSuccess = (position) => {
        const { latitude: lat, longitude: lng } = position.coords;

        this.setState({
            ready: true,
            where: { lat, lng },
        });
    };

    geoFailure = ({ message }) =>
        this.setState({ error: message });

    render() {
        return (
            <View style={styles.container}>
                { !this.state.ready && (
                  <Text style={styles.big}>
                    Using Geolocation in React react-native
                  </Text>
                )}
                { this.state.error && (
                  <Text style={styles.big}>
                    {this.state.error}
                  </Text>
                )}
                { this.state.ready && (
                    <Text style={styles.big}>{
                    `Latitude: ${this.state.where.lat}
                    Longitude: ${this.state.where.lng}`
                    }</Text>
                )}
            </View>
        );
    }
}

const styles = StyleSheet.create({
    container: {
        flex: 1,
        backgroundColor: '#fff',
        alignItems: 'center',
        justifyContent: 'center'
    },
    big: {
        fontSize: 48
    }
});
Native, Web, Hybrid Apps: advantages and disadvantages
Web Apps
Typically, web apps are built in JavaScript, CSS, and HTML5 and run inside a browser (Safari, Chrome, etc.). There is no software development kit for developers to use; however, there are templates that developers can work with.
If you choose to develop a web app, it can be straightforward and quick to build. Although, they are often oversimplified and don’t offer the same features native apps provide.
Advantages of Web Apps
- Easy to build
- Easy to maintain
- Inexpensive
- Build one app for all platforms – iOS, Android, etc. as long as it can run in a browser
Disadvantages of Web Apps
- Needs a browser to run. Users have to take another step to type in the URL, which contributes to a complicated user experience
- Much slower than native apps
- Less interactive and intuitive than native apps
- No icon on the mobile desktop as you would if it were downloaded from app stores
- Cannot leverage device utilities
Native mobile apps
Native mobile apps are the most common type of app. They are built for specific platforms and are written in languages that the platform accepts, for example, Swift and Objective-C for native iOS apps and Java or Kotlin for native Android apps. Native apps are also built using the specific Integrated Development Environment (IDE) for the given operating systems.
Both Apple and Google provide app developers with their own development tools, interface elements, and SDK. Most companies will invest in native mobile app development because of the multitude of benefits offered in comparison to other types of apps. Here are some of the main benefits:
Advantages of Native Apps
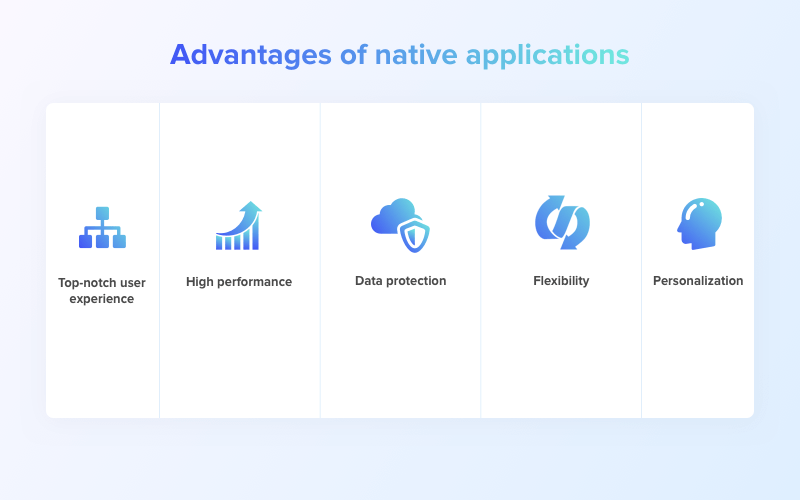
Rich user experience This is an undeniable advantage of native apps. Mobile developers and UX designers can focus their efforts on tailoring the app’s functionality to one platform that has its own design language, unique elements, and set gestures.
All this allows to achieve the sense of unity and allow users to more intuitively navigate through the interface as well as better understand the functionality of your application.
In addition, native applications can make full use of offline mode capabilities while everything isn’t as easy with hybrid apps. Developers can face tons of problems during the implementation of offline mode.
High performance Considering hybrid vs. native app development, we should touch upon the performance question.
The application that was created and optimized for a specific platform can demonstrate an unbelievably high level of a performance. Developers deal with the battery and memory consumption to reach decent results.
However, native apps perform fast not only because of optimization but the code itself. It works faster as it’s written in the programming language natively supported by the platform. What’s more, this allows integrating new features a way faster.
Security matter Create a native app is the only way to guarantee your users a reliable data protection. It’s all about mathematics. The full power of hardware should be engaged to process tasks and hybrid applications can’t make the most of hardware.
Full-fledged functionality If you’re looking for reasons why native apps are better, we should stress that they have the full access to databases, hardware features of a device. Moreover, their functionality isn’t limited to plugins or any other third-party tools.
Native applications have no limitations related to the creation of interface as they don’t have to consider the peculiarities of several operating systems to meet the requirements of each one.
Personalization Fragmentation makes it hard to adjust the layout for different devices. This is especially true for Android-based devices. Native development is the only way to keep the design at a high level and deliver a great experience to all users of your product.
Disadvantages of Native Apps
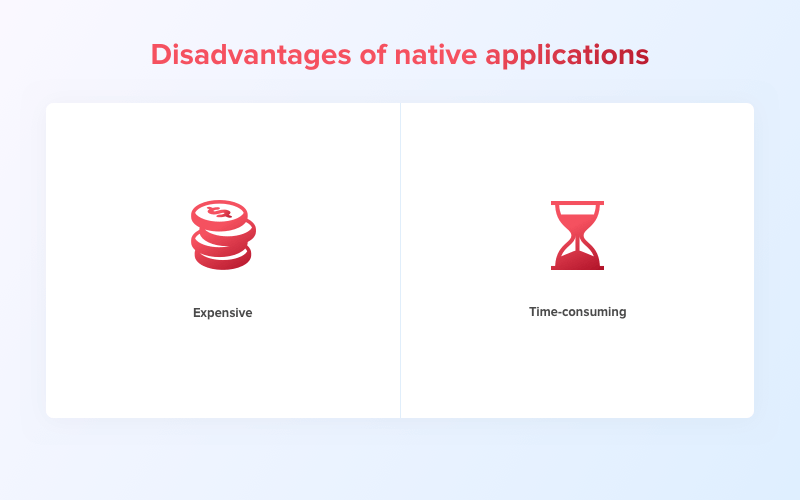
Cost of development The process of developing the native app is complex and requires the participation of more qualified staff. That’s why, you can expect considerable spending.
Time of development This kind of app requires more time to be built. If you need apps for both platforms and need them fast, you better think about simultaneous development.
Note
Keep in mind, native apps require users to keep downloading updates to improve accessibility and user experience, while developers can publish updates to web apps without any involvement from the user.
Hybrid App Development
Hybrid apps are essentially a combination of native and web apps. A hybrid app consists of two parts: the first is the back-end code, and the second is a native shell that is downloadable and loads the code using a webview. Hybrid apps are less expensive than native apps, don’t require a browser, and can leverage device APIs; however, they’re slower than native apps and are not customizable to individual platforms like native apps.
Advantages of Hybrid Apps
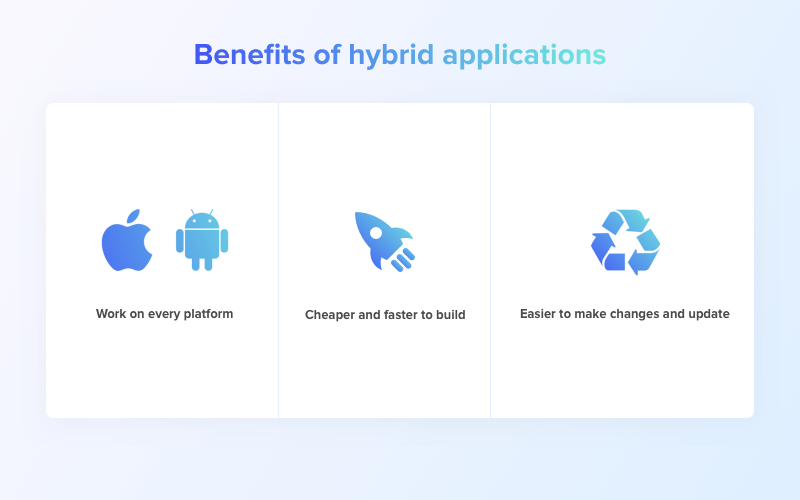
Work across multiple platforms The cross-platform capabilities may become the decisive factor for many stakeholders making a choice between native or hybrid app. Hybrid apps can run both Android and iOS having just one code base.
This means you don’t have to build the app for each platform as in the case with native apps. Mobile developers create the single code base that can function across Android and iOS.
This is a good news for stakeholders whose primary objective is to target as much audience as possible. What’s more, they don’t need to decide on which platform to build first as the broad reach can be reached with one solution.
This benefit of hybrid apps will be definitely helpful for you in case you need a mobile solution increasing the brand awareness.
Faster to build It’s less time-consuming to create a hybrid app compared to the native one. Developers don’t have to create a new code base for each platform.
In addition, the building and testing processes are easier to some extent and your QA engineer will need less time to make sure the product is bug-free and high-quality.
Easier to change and update Native and hybrid applications also differ in such aspects as making changes and updating.
Again, due to the single codebase, your team of developers doesn’t have to work with each platform separately in order to, let’s say, change the placement of several elements. It’s enough to make changes once and they’ll be applied to all platforms your hybrid app works across.
Comparing hybrid versus native apps, it's worth mentioning that updates containing bug fixes and enhancements are implemented a way better in hybrid applications. At least from the point of user experience. Users don’t have to download the latest version of your app manually through marketplaces to get rid of an irritating bug that has suddenly appeared some time ago. This is a pretty common situation for the IT industry and hybrid applications are more flexible in this regard.
If any kind of issue happens on a page that’s loaded from a server, developers can fix that and users will get the refreshed version the next time they launch your app.
Cheaper to build Due to the single codebase, the hybrid application running both iOS and Android can be implemented for nearly the same period of time that’s required to build one native app for one platform. The development time directly influences the final cost of your product.
For example, in Ukraine and some other countries of Eastern Europe, the price for one hour of development ranges between 40-50$. If we take an approximate amount of time required to develop an app of medium complexity (~600 hours) and multiply it by 50$, we'll get a development cost equal to $30K.
That’s the approximate price for one hybrid app working across multiple platforms or for one native app that can function within one platform. What’s more, that’s the price for the concrete region as in North America one hour of development may cost you from $100 up to $250.
Disadvantages of hybrid apps
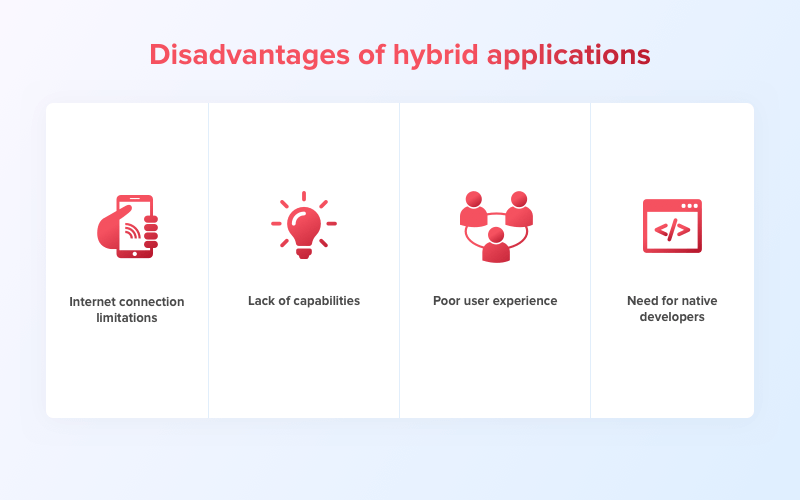
- Internet connection Hybrid apps are websites at their core and they require a constant internet connection to deliver the full range of features to the users. This way, you may face certain difficulties when implementing offline access to a part of their functionality.
Also, comparing hybrid vs. native apps, we should say that it takes more time for hybrid applications to load all their elements and, respectively, they may work slower.
That’s the reason why the hybrid approach suits well for content-oriented apps. They are quite simple and not overloaded with complex functions to work fast enough.
Limited capabilities Due to the nature of hybrid mobile apps' architecture, they rely on plugins to access the built-in features of a device. The disadvantage of such a method is that those plugins can be out of date or unreliable. Moreover, developers may need to create plugins on their own in case there are no ready-made solutions allowing to access a certain part of the device functionality you need.
Poor user experience It’s something that must be at a high level regardless of what you choose: a native or hybrid app. Unfortunately, the user experience isn’t the strong side of hybrid applications since the interface for both iOS and Android platforms should meet somewhere in the middle. In case you focus too heavily on Android, the experience will be worse for iOS users and vice versa.
Need for native app developers The paradox is, you are likely to need native app developers to build a hybrid application. That’s because the hybrid app development approach still can’t solve a variety of functional problems that are basic for native development. So, you may need a native developer as a part of your team to create a quality product.